schok flip phone manual
Schok Flip Phone Manual: A Comprehensive Guide
This manual provides detailed instructions for the Schok SC3218B, covering setup, operation, troubleshooting, and warranty details for optimal user experience.
Welcome to the world of simple, reliable communication with your Schok Flip Phone! This device, like the Nokia 1203/1208/1650, offers essential features in a classic, user-friendly format. The Schok Classic Flip SC3218B is an unlocked 4G LTE smartphone designed for straightforward use.
This manual will guide you through every aspect of your phone, from initial setup – including SIM card and battery insertion – to making calls, sending texts, and utilizing its basic functionalities. We’ll also cover troubleshooting common issues to ensure a seamless experience. Discover how to maximize your Schok phone’s potential!
Understanding the Schok SC3218B Model
The Schok SC3218B is a Boost-compatible, unlocked black flip phone boasting 8GB of storage. It’s a 4G LTE smart cell phone, though carrier compatibility requires verification – it’s currently listed as “Carrier Unknown”. This model aims to provide essential connectivity without the complexities of modern smartphones.
Similar to the Nokia 1203, 1208, and 1650, the SC3218B prioritizes call and text functionality. Understanding its core features requires recognizing its focus on simplicity and reliability. Ensure you have the full model name and serial number for warranty purposes, as detailed in product documentation.
Key Features and Specifications
The Schok SC3218B offers 8GB of internal storage, supporting basic smartphone functions within a classic flip phone form factor. It operates on 4G LTE networks, providing reasonable data speeds where available, though carrier compatibility needs confirmation.
Compared to Nokia’s 1203, 1208, and 1650 models – priced between Rs 1,240 and Rs 1,702 – the Schok phone provides a more modern experience. Key specifications include its unlocked status, allowing use with compatible carriers, and its Boost compatibility. Warranty claims require the full model name and serial number.
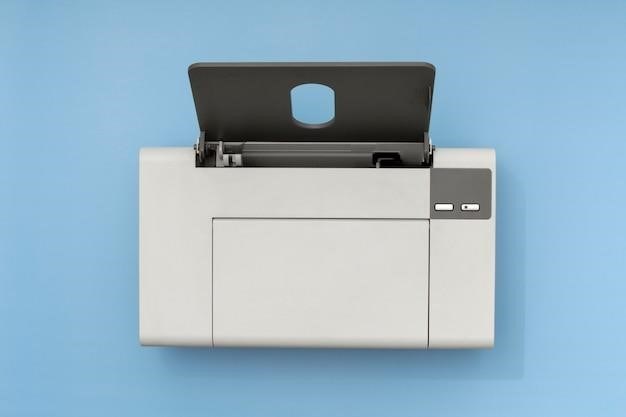
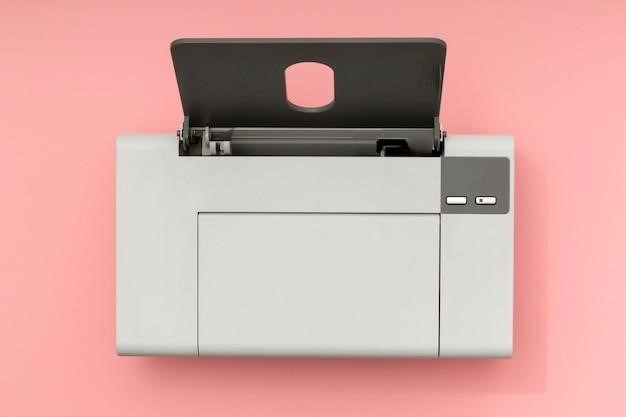
Physical Overview of the Phone
The Schok Classic Flip Phone SC3218B presents a familiar, compact design. Its black finish offers a sleek aesthetic. The device features a traditional flip mechanism, protecting the internal screen and keypad when closed.
Detailed identification of buttons and ports is crucial for operation. While specific port details aren’t readily available, standard features like a charging port and potentially a SIM card slot are present. The internal display provides the user interface, and navigation relies on the keypad. Understanding the phone’s physical layout enhances usability.
Button and Port Identification
The Schok SC3218B features a standard keypad for dialing and text input. Dedicated buttons likely include power, call send/receive, and directional navigation. A charging port, typically micro-USB, is located on the phone’s base for power replenishment.
The SIM card slot, essential for network connectivity, is usually found under the battery or on the side. Precise port locations aren’t detailed, but are generally accessible. Familiarizing yourself with these components ensures proper device operation and maintenance. Careful handling prevents damage to these vital connection points.
Display and Navigation
The Schok SC3218B utilizes a basic display for call information, text messages, and menu options. Navigation relies on a directional keypad, allowing users to scroll through menus and select features. The screen’s clarity is optimized for essential viewing, prioritizing readability over high-resolution graphics.
Expect a simple user interface designed for ease of use. Menu structures are straightforward, facilitating quick access to core functionalities. The phone’s design emphasizes practicality, offering a functional navigation experience for everyday communication needs. Mastering the directional pad is key to efficient operation.

Setting Up Your Schok Flip Phone
Initial setup involves inserting a compatible SIM card and the provided battery. Ensure the SIM card is correctly oriented before insertion, following the diagram inside the battery compartment. Once installed, securely close the phone’s cover. The Schok SC3218B is designed for straightforward activation, prioritizing ease of use for all users.
Power on the device by pressing and holding the power button. Follow the on-screen prompts to select your preferred language and complete the activation process. Verify network connectivity and ensure the phone registers with your carrier for optimal performance.
Inserting SIM Card and Battery
Before using your Schok SC3218B, insert a valid SIM card and the rechargeable battery. Locate the battery compartment on the back of the phone; gently remove the cover. Insert the SIM card into the designated slot, ensuring the gold contacts face down and align with the notch.
Next, align the battery contacts with those in the compartment and gently press it into place. Reattach the battery cover until it clicks securely. Incorrect insertion may prevent the phone from powering on or functioning correctly. Always handle components with care.

Initial Power-On and Activation

To power on your Schok SC3218B, press and hold the power button, typically located on the side of the device. The screen will illuminate, displaying the Schok logo and initiating the startup sequence. Follow the on-screen prompts to select your preferred language and region.
You may be asked to enter a PIN code associated with your SIM card, if one is enabled. Once activated, the phone will connect to the network. Ensure a strong signal for optimal performance. Initial setup may take a few moments.
Making and Receiving Calls
The Schok SC3218B facilitates clear communication with its straightforward calling features. To dial a number, use the numeric keypad to enter the desired phone number, then press the call button (often a green phone icon). During a call, options like speakerphone and mute may be available.
To answer an incoming call, press the answer button (typically the center button). To end a call, press the end button (often a red phone icon). Access your call history to quickly redial recent numbers or view missed calls.
Dialing a Number
Initiating a call with your Schok SC3218B is a simple process. Begin by opening the flip phone to activate the keypad and display. Using the numeric keypad, carefully enter the complete phone number you wish to dial, including any necessary area codes or country codes.
Once the number is entered, locate and press the designated “call” button – typically represented by a green telephone icon. The phone will then attempt to connect your call. Ensure a stable network connection for optimal call quality.
Answering and Ending Calls
When receiving an incoming call on your Schok SC3218B, the phone will ring and the caller’s number (if available) will be displayed on the screen. To answer the call, simply open the flip of the phone or press the designated “answer” button – often the same button used for initiating calls.
During a call, to end the connection, press the “end” button – typically a red telephone icon. This will disconnect the call and return you to the phone’s standby mode.
Call History and Contacts
Your Schok SC3218B stores a record of your recent calls, allowing you to easily redial numbers. Access the call history through the phone’s menu – typically labeled “Call Log” or “Recent Calls”. This section displays incoming, outgoing, and missed calls with associated timestamps.
While the Schok flip phone offers basic contact storage, it may have limited capacity. To save a contact, navigate to the contacts section and add the name and number. You can then quickly dial contacts directly from the contacts list.
Text Messaging (SMS)
The Schok SC3218B supports standard SMS text messaging, enabling you to send and receive short messages. To compose a new message, access the messaging application from the phone’s main menu. Enter the recipient’s phone number or select a contact from your address book.
Type your message using the phone’s keypad. The phone may offer predictive text input to speed up typing. Once finished, send the message. Received messages will appear in your inbox, allowing you to read and reply as needed. Message storage capacity may be limited.
Composing a New Message
To begin a new text message, navigate to the Messaging app via the phone’s menu. Select “New Message” or a similar option, often represented by a plus (+) icon. You’ll be prompted to enter the recipient’s number; you can also choose from your Contacts list for convenience.
Utilize the keypad to input your message text. The Schok SC3218B may feature predictive text to assist with faster typing. Review your message carefully before pressing the “Send” button. Ensure the correct number is entered to avoid sending to the wrong recipient.
Reading and Replying to Messages
New messages will appear in the Messaging app, often indicated by a notification on the phone’s display. Select the message to view its contents. The sender’s number or contact name will be displayed. To reply, navigate to the “Reply” option, typically found at the bottom of the message screen.
A new message composition window will open, pre-populated with the sender’s number. Type your response using the keypad, and then press “Send” to deliver your reply. You can also delete messages from your inbox once read, freeing up storage space.
Camera Functionality
The Schok SC3218B features a built-in camera for capturing photos. Access the camera application from the phone’s menu. The camera interface is designed for simplicity, offering basic options like image quality settings. Point the phone at your subject and press the capture button to take a photo. Ensure adequate lighting for optimal image clarity.
Captured photos are stored in the phone’s internal memory. You can view photos through the Gallery or Photos app. From there, you can delete unwanted images to manage storage space. The camera offers a straightforward way to document moments on the go.
Taking Photos
To initiate photo capture, navigate to the Camera application within the phone’s menu. Frame your desired subject within the viewfinder displayed on the screen. Ensure sufficient lighting conditions for a clearer image; avoid shooting directly into bright light sources. Press the designated capture button – typically a central button on the phone’s keypad – to take the photograph.
A brief animation will confirm the photo has been taken. The image is automatically saved to the phone’s internal storage. Review the captured image immediately to assess quality and retake if necessary. Simple operation ensures quick and easy photo taking.
Viewing and Deleting Photos
To view captured photos, access the Gallery or Photos application from the main menu. A thumbnail display will present all saved images. Select a photo to view it in full-screen mode. Utilize the navigation keys to scroll through your photo collection. To delete an unwanted photo, highlight it and select the ‘Delete’ option, usually indicated by a trash can icon.
Confirm the deletion when prompted. Deleted photos are typically moved to a ‘Recently Deleted’ folder, allowing for potential recovery within a limited timeframe. Ensure careful consideration before permanent deletion.
Basic Phone Settings
Accessing the Settings menu allows customization of your Schok flip phone. Volume Control adjusts ringer, media, and notification levels. Navigate to ‘Sound’ or ‘Volume’ within Settings to modify these. Date and Time Settings ensure accurate timekeeping; access ‘Date & Time’ to manually set or enable automatic updates.

Language Selection permits changing the phone’s interface language. Find ‘Language’ within Settings and choose your preferred option. These basic settings enhance usability and personalize your phone experience.
Volume Control
Adjusting the volume on your Schok flip phone is straightforward. From the main menu, navigate to ‘Settings’ and then select ‘Sound’ or ‘Volume’. Here, you’ll find separate sliders for Ringer Volume, controlling the loudness of incoming calls, and Media Volume, governing the sound from the FM radio or any multimedia files.
Notification Volume allows you to set the loudness for alerts and messages. Use the directional keys to increase or decrease each volume level as desired. Remember to save your changes before exiting the settings menu.
Date and Time Settings

Setting the correct date and time ensures accurate timestamps for calls, messages, and other phone functions. Access these settings through the ‘Settings’ menu, then select ‘Date & Time’. You can typically choose between automatic date & time, which synchronizes with the network, or manual setting.
If opting for manual configuration, carefully input the current date (MM/DD/YYYY – as of today, 03/04/2026) and time (HH:MM:SS). Ensure the AM/PM setting is correct. Save your changes to apply the new date and time.
Language Selection
Personalize your Schok flip phone by selecting your preferred language for the user interface and menus. Navigate to the ‘Settings’ menu, then locate the ‘Language’ option. A list of available languages will appear on the display.
Use the navigation keys to scroll through the list and highlight your desired language. Confirm your selection by pressing the ‘OK’ or center button. The phone’s interface will automatically update to the chosen language. This ensures a comfortable and intuitive user experience;
Advanced Features (If Applicable)
The Schok SC3218B may include Bluetooth connectivity for hands-free calling and data transfer with compatible devices. To pair, access the ‘Bluetooth’ menu in settings and enable visibility. Select your device from the list.

Additionally, an FM radio function is present, offering entertainment without data usage. Use headphones as an antenna for optimal reception. Explore these features to enhance your mobile experience. Note that functionality may vary based on carrier and software version.
Bluetooth Connectivity
To enable Bluetooth on your Schok SC3218B, navigate to the ‘Settings’ menu and select ‘Bluetooth’. Activate the Bluetooth function, making your phone discoverable. A list of available devices will appear. Select your desired device – headphones, speakers, or another phone – from the list.
You may be prompted to enter a pairing code; typically ‘0000’ or ‘1234’. Once paired, the device will connect automatically when in range. Bluetooth allows for hands-free calling and wireless audio streaming, enhancing your mobile experience.
FM Radio Usage
To access the FM radio on your Schok SC3218B, locate and launch the ‘FM Radio’ application from the main menu. Ensure your headphones are connected, as they function as the antenna. The radio will automatically scan for available stations.
Use the navigation keys to tune to your preferred frequency. You can save favorite stations for quick access. Adjust the volume using the volume control buttons. Enjoy listening to local radio broadcasts without using mobile data – a convenient feature for entertainment and information.
Troubleshooting Common Issues
If your Schok flip phone fails to power on, first ensure the battery is correctly inserted and adequately charged. Try a different charger if possible. No network signal? Verify your SIM card is properly inserted and activated with your carrier.
Check for any network outages in your area. Restarting the phone often resolves temporary glitches. If issues persist, perform a factory reset (note: this will erase all data). For continued problems, consult the warranty information and support section for assistance.

Phone Not Powering On
If your Schok SC3218B isn’t turning on, begin by confirming the battery is securely inserted. A loose connection is a common cause. Next, connect the phone to the provided charger and allow it to charge for at least 30 minutes, even if the screen remains blank.
Try a different compatible charger and cable to rule out a faulty charging accessory. If still unresponsive, attempt a hard reset (consult online resources for the specific key combination for this model). Contact Schok support if these steps fail to resolve the issue.
No Network Signal
Experiencing “No Network” on your Schok SC3218B? First, ensure you’re in an area with known network coverage. Verify the SIM card is correctly inserted and activated with your carrier. Try toggling Airplane Mode on and off; this often re-establishes the connection.
Manually select your network operator within the phone’s settings. If the problem persists, contact your mobile carrier to confirm your account is active and there are no local outages. A reset to factory settings might also resolve software-related signal issues.
Warranty Information and Support
Your Schok Flip Phone comes with a limited warranty protecting against manufacturing defects; To initiate a warranty claim, locate the serial number on the phone’s nameplate – this is crucial for verification. Keep your purchase date readily available.
For support, visit the official Schok website or contact their customer service team. Warranty details, including duration and coverage specifics, are outlined in the included documentation. Ensure you have the full model name (SC3218B) when contacting support for efficient assistance.
Locating the Serial Number
Finding your Schok Flip Phone’s serial number is essential for warranty claims and support inquiries. The serial number is printed on a label affixed to the phone’s fuselage, often located under the battery cover. Carefully remove the battery cover – do not use excessive force.
The serial number is a unique identifier for your specific device. Record this number and your purchase date for future reference. Having this information readily available will expedite any support requests or warranty processes. Keep it in a safe place alongside your purchase receipt.
Contacting Schok Support
For assistance with your Schok Flip Phone, reaching out to their support team is crucial. While specific contact details aren’t readily available online, generally, manufacturers offer support through their official website. Look for a “Support” or “Contact Us” section.
Prepare your phone’s serial number and purchase date before contacting support; this information speeds up the process. You may find FAQs or troubleshooting guides online. If direct assistance is needed, look for email or phone contact options. Be patient and clearly explain your issue.
Safety Precautions and Regulatory Information
To ensure safe usage of your Schok Flip Phone, avoid operating it while driving. Keep the device away from water and extreme temperatures. Only use approved accessories. Do not attempt to disassemble the phone yourself; this voids the warranty and poses safety risks.
Regulatory information regarding radio frequency emission compliance is vital. This device adheres to industry standards, but maintaining a safe distance is recommended. Dispose of the phone responsibly, following local e-waste regulations. Further details can be found within the full user manual.
Comparison with Similar Models (Nokia 1203/1208/1650)
The Schok Flip Phone SC3218B competes with classic models like the Nokia 1203 (Rs 1,240), 1208 (Rs 1,442), and 1650 (Rs 1,702). While Nokias prioritize simplicity and battery life, the Schok offers 8GB of storage and potentially 4G LTE connectivity – features absent in older Nokias.
The Schok aims for a balance between retro design and modern functionality. Nokia models are known for durability, but the Schok provides expanded capabilities. Consider your needs: basic communication versus added storage and network speed.
Understanding Heat Shock Proteins (Hsp 70) ー Related Technology
Although seemingly unrelated to a flip phone, research into Heat Shock Protein 70 (Hsp70) reveals fascinating parallels in stress response and material resilience. Studies analyze Hsp70’s physiological functions, highlighting its role in cellular protection – a concept mirroring a phone’s need to withstand operational ‘stress’.
This biological mechanism inspires advancements in material science, potentially influencing durability in device components. Understanding Hsp70’s properties could inform future designs focused on enhanced shock resistance and longevity, even in seemingly simple devices.
Potential Applications in Automotive Shock Absorbers (Shaanxi Shacman SX5315GJB5V326C)
Interestingly, advancements in shock absorption technology, exemplified by components like those used in the Shaanxi Shacman SX5315GJB5V326C vehicle, demonstrate a focus on resilience. While a flip phone isn’t directly linked, the principle of mitigating impact is universal.
Exploring materials and designs that enhance shock resistance in automotive systems could inspire innovations in mobile device protection. Consideration of robust casing materials and internal component stabilization, mirroring automotive shock absorber functionality, could improve phone durability.