t6 thermostat install manual
T6 Thermostat Installation Manual
This manual provides comprehensive instructions for installing the T6 Pro Programmable Thermostat. It covers topics such as package contents, installation process, wiring, thermostat mounting, system operation settings, troubleshooting, and specifications. The manual is designed to guide you through the installation process smoothly and efficiently.
Introduction
Welcome to the Honeywell Home T6 Pro Programmable Thermostat installation manual. The T6 Pro Thermostat is a Z-Wave Plus certified thermostat capable of controlling up to three heat and two cool stages of heat pump systems, including dual fuel heat pump systems, as well as up to two heat and two cool stages of conventional systems. This versatile thermostat allows you to schedule your heating and cooling preferences to optimize comfort and energy efficiency.
This manual provides a comprehensive guide for installing the T6 Pro Thermostat. It covers essential aspects such as package contents, the installation process, wiring conventions, thermostat mounting, system operation settings, troubleshooting tips, and technical specifications. The step-by-step instructions and clear illustrations ensure a seamless installation experience.
By carefully following the procedures outlined in this manual, you can successfully install and configure your T6 Pro Thermostat. This will enable you to enjoy its advanced features, including programmable schedules, temperature control, and smart home integration.
Package Contents
The T6 Pro Programmable Thermostat package includes all the necessary components for a successful installation. The following items are included⁚
- T6 Pro Thermostat⁚ The heart of the system, featuring a user-friendly interface and advanced functionality.
- UWP Mounting System⁚ A secure and versatile mounting system designed for easy installation and a professional look.
- Honeywell Standard Installation Adapter (J-box adapter)⁚ Facilitates a quick and straightforward connection to your existing wiring.
- Honeywell Decorative Cover Plate — Small⁚ A stylish cover plate (measuring 4 49/64 in x 4 49/64 in x 11/32 in (121 mm x 121 mm x 9 mm)) that enhances the appearance of your thermostat.
- Screws and Anchors⁚ Securely mount the thermostat to your wall.
- 2 AA Batteries⁚ Provide backup power in case of power outages, ensuring uninterrupted operation.
- Installation Instructions and User Guide⁚ A comprehensive guide that outlines the installation process and provides detailed information on operating your thermostat.
Please ensure that all components are present before proceeding with the installation process. If any items are missing, contact Honeywell Customer Care toll-free at 1 800 468 1502 for assistance.
Installation Process
Installing your T6 Pro Programmable Thermostat is a straightforward process that can be completed with a few simple steps. Before you begin, make sure you have the necessary tools, including a Phillips head screwdriver and wire strippers. Additionally, familiarize yourself with the wiring diagram provided in the manual. The installation process can be divided into two main stages⁚ mounting the thermostat and connecting the wires.
The first step involves mounting the UWP mounting system to the wall. The UWP mounting system offers flexibility, allowing you to position the thermostat in the most convenient location. Ensure the mounting surface is clean and free of obstructions. Once the UWP mounting system is in place, you can proceed with connecting the wires.
Carefully remove the thermostat cover to access the wiring terminals. Match the wires to their corresponding terminals based on the wiring diagram, ensuring a secure connection. Once the wires are securely connected, reassemble the thermostat and test its functionality. Refer to the troubleshooting section in the manual if you encounter any issues during the installation process.
UWP Mounting System Installation
The Universal Wall Plate (UWP) Mounting System offers flexibility for positioning your T6 Pro Thermostat. Before starting, ensure the mounting surface is clean and free of obstructions. The UWP mounting system comes with a wall plate, screws, and anchors.
Begin by locating the desired position for your thermostat. Use the included template to mark the screw locations on the wall. Then, use a drill to create pilot holes for the screws. Next, insert the anchors into the pilot holes, ensuring they are securely seated.
Align the wall plate with the marked locations and screw it into place using the provided screws. It’s crucial to ensure the wall plate is level before tightening the screws. Once the wall plate is firmly mounted, you can proceed with attaching the thermostat to the UWP mounting system.
Wiring Terminal Designations
The T6 Pro Thermostat features a clearly labeled wiring terminal block for easy connection. Each terminal is designated with a specific letter and color code for seamless identification. These designations correspond to the common wiring standards used in HVAC systems.
Before connecting any wires, ensure the power to your HVAC system is switched off. Carefully identify each wire from your existing system and match them to the corresponding terminals on the thermostat.
The terminals are labeled with letters such as “R” for “Red” (power), “W” for “White” (heating), “G” for “Green” (fan), “Y” for “Yellow” (cooling), and “C” for “Common” (neutral). Refer to the wiring diagram provided in your T6 Pro Thermostat installation guide for specific wire connections based on your HVAC system type.
Wiring Conventional Systems
Wiring a T6 Pro Thermostat for a conventional HVAC system requires careful attention to ensure proper functionality. Conventional systems typically use a combination of heating and cooling stages, controlled by separate wires. The T6 Pro supports up to two heat and two cool stages, providing flexible control for various system configurations.
Before connecting any wires, ensure the power to your HVAC system is switched off. Identify the wires from your existing system and match them to the corresponding terminals on the thermostat. The terminals are labeled with letters such as “R” for “Red” (power), “W” for “White” (heating), “G” for “Green” (fan), “Y” for “Yellow” (cooling), and “C” for “Common” (neutral). Refer to the wiring diagram provided in your T6 Pro Thermostat installation guide for specific wire connections based on your HVAC system type.
The installation guide will detail the wire connections for different heating and cooling stages, including the use of auxiliary heat (aux) and emergency heat (EH) if applicable. Ensure all connections are secure and properly insulated before restoring power to your system.
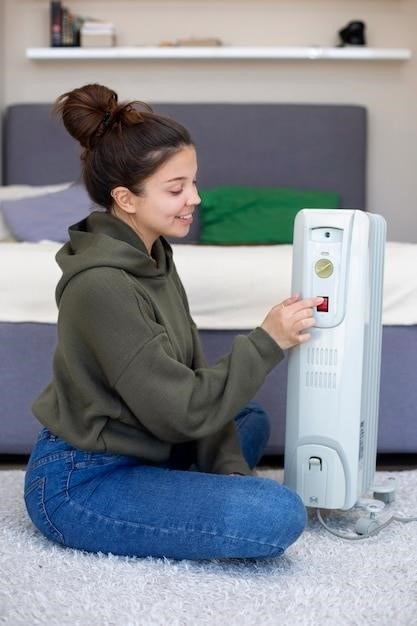
Thermostat Mounting
Mounting the T6 Pro Thermostat is a simple process that requires careful consideration of placement for optimal performance. Choose a location that is easily accessible and visible, avoiding direct sunlight, drafts, or heat sources. The thermostat should be mounted on a flat, solid surface, such as a wall or electrical box.
The T6 Pro Thermostat comes with a Universal Wall Plate (UWP) mounting system, designed for easy installation. The UWP system provides a secure and aesthetically pleasing mounting solution. The T6 Pro Thermostat is compatible with standard electrical boxes and can be mounted directly or using an optional cover plate for a more finished look.
Before mounting the thermostat, use a level to ensure the UWP mounting plate is straight. Secure the UWP mounting plate using the screws and anchors provided, making sure the plate is firmly attached to the wall. Then, carefully align the thermostat with the UWP mounting plate and snap it into place, ensuring a secure connection. Once the thermostat is securely mounted, you can proceed with wiring and system setup.
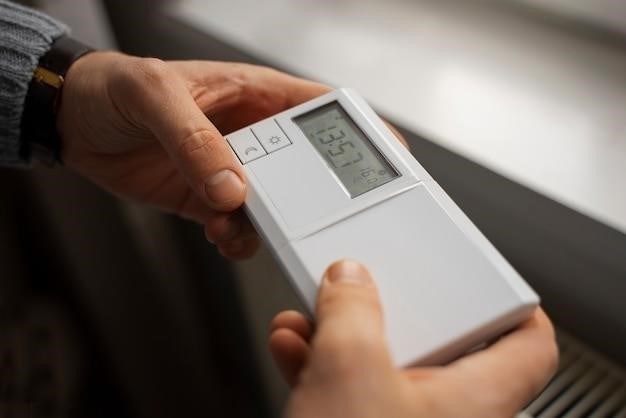
System Operation Settings
Once the T6 Pro Thermostat is installed and wired, it’s time to configure the system operation settings to match your preferences and heating/cooling system. This involves setting the desired temperatures, programming the thermostat for different times of the day and days of the week, and selecting the appropriate system mode (heat, cool, auto, or fan only). The T6 Pro Thermostat provides a user-friendly interface with clear instructions and intuitive navigation, making it easy to set up and adjust these settings.
To access the system operation settings, navigate through the thermostat’s menu using the buttons provided. The menu options will guide you through setting the desired temperature, programming the thermostat for different time periods, and selecting the appropriate system mode. You can also configure the thermostat to activate features such as adaptive intelligent recovery, which learns your system’s heating and cooling patterns and optimizes performance for maximum comfort.
Remember to refer to the user guide for detailed instructions and explanations of the various system operation settings. The user guide provides clear explanations of each setting and provides examples of how to configure them effectively for your specific needs.
Installer System Test
After completing the installation and configuring the system operation settings, it’s crucial to perform a thorough system test to ensure the T6 Pro Thermostat is functioning correctly. This involves verifying that the thermostat is receiving power, communicating with the heating and cooling system, and accurately controlling the temperature. A successful system test ensures that the thermostat is ready to operate and provide optimal comfort in your home.
Start by checking the thermostat’s display to ensure it’s powered on and displaying the current temperature. Next, cycle through the different system modes (heat, cool, auto, and fan only) to verify that the thermostat is switching between modes as expected. Observe the heating and cooling system to confirm that it is responding to the thermostat’s commands. For example, when you switch to the “heat” mode, the furnace should turn on, and when you switch to the “cool” mode, the air conditioner should turn on.
If you have any doubts or encounter any problems during the system test, refer to the troubleshooting section in the user guide or contact customer support for assistance. A successful system test is essential for ensuring the T6 Pro Thermostat operates correctly and provides optimal comfort in your home.
Troubleshooting
While the T6 Pro Thermostat is designed for ease of use, occasional issues might arise. If you encounter any difficulties with your thermostat, review the following troubleshooting tips before contacting customer support; Many common problems can be resolved quickly and easily.
If the display is blank, check the circuit breaker and reset it if necessary. Ensure the power switch for the heating and cooling system is turned on. If the thermostat is not responding to commands, check the battery level and replace them if necessary. Verify that the wiring connections are secure and properly connected to the terminals. If the temperature is not being controlled accurately, adjust the system settings, such as the temperature setpoints and fan speed. Check the air filter and replace it if it’s dirty.
If you’re still experiencing issues, consult the user manual for further troubleshooting steps. If the problem persists, contact Honeywell customer support for assistance. They can provide additional guidance and support to resolve any issues you may encounter.
Specifications
The T6 Pro Programmable Thermostat boasts a range of features and technical specifications designed for optimal performance and energy efficiency. It is compatible with both heat pump and conventional systems, offering flexible control options. The thermostat can control up to three heat and two cool stages for heat pump systems, and up to two heat and two cool stages for conventional systems. This versatility allows you to customize the thermostat to meet the specific needs of your heating and cooling system.
The T6 Pro is equipped with a user-friendly interface that allows you to easily program schedules, adjust temperature settings, and monitor system performance. It includes a clear display screen, intuitive controls, and a variety of settings for customizing your comfort preferences. The thermostat also features a built-in air filter reminder, helping you maintain optimal indoor air quality and improve system efficiency.
The T6 Pro is designed for reliability and durability, with a 5-year limited warranty for peace of mind. For detailed technical specifications, including dimensions, power requirements, and communication protocols, refer to the user manual or the product documentation on the Honeywell website.